Dinner: Shrimp Scampi Zoodles

IMG_1678For a while the wife had been wanting a vegetable spiralizer to make zucchini noodles (or zoodles if you will).  After buying one of the “Made for TV” ones, we sent that back and got a Sur La Table version (here).  As soon as she got it, she got to spiralizing some veggies.  One of the first meals we tried was a Skinnytaste recipe for shrimp scampi using zucchini noodles.  We’re both a fan of pasta dishes, so it made sense to give this a shot.

Putting the zucchini through the spiralizer was a pretty simple process.  As you can see in the shot below, the “zoodles” came out pretty good.  You can set the thickness of the zoodles depending on how you want them to come out.  Since we were making a pasta dish, we opted for thinner ones as we like angel hair pasta.

The recipe came together easily after the zucchini noodles were all made up. To add a little extra to the dish the wife roasted up some cherry tomatoes in the oven. We let them get a nice little color on them while we put together the pasta dish.  Once the shrimp was done cooking in the pan, you go ahead and add the other ingredients.  We through the noodles and tomatoes into the pan and gave them a mix.  We threw on the last of the ingredients and got them to the plates.  To top them off, we put some parmesan cheese on top (it’s still a pasta dish after all…and I am Italian).

The dish was really good.  The zoodles still had a little crunch to them and were not mushy.  There was enough lemon and garlic in there to add a really nice flavor.  The red pepper flakes added a nice little bite that we both like on our pasta dishes.  The roasted tomatoes really added a nice change of texture and flavor to the dish as well.  The wife complimented the meal the entire time, while I just shoved it in my face.  You can tell how much I like a meal to how little I talk while eating it.

We’ve made some other zucchini noodle recipes since we’ve gotten the spiralizer and the’ve been great.  It’s a nice way to change up a simple side to a meal or make a pasta dish healthier.  So, another good Skinnytaste meal in the books and another kitchen gadget getting put to good use!

Shrimp Scampi Zoodles for Two

Ingredients:

  • 2 medium zucchini, about 8 oz each
  • 1/2 tbsp unsalted butter
  • 2 tsp extra virgin olive oil. divided
  • 4 minced garlic cloves, divided
  • 12 large peeled and deveined shrimp (about 6.5 oz)
  • kosher salt, to taste
  • freshly ground black pepper
  • 1 tbsp chopped fresh parsley leaves
  • 1/2 tsp fresh grated lemon zest
  • 3 tbsp freshly squeezed lemon juice (from 1 lemon)
  • 1/8 tsp hot red pepper flakes

Directions:

  1. Use a mandolin fitted with a julienne blade or a spiralizer to cut the zucchini into noodles. Cut the strips into 6 to 8-inch strips.
  2. In a large nonstick pan, melt the butter and 1 teaspoon olive oil over medium heat. Add the garlic and saute for 1 minute. Add the shrimp, kosher salt, and the pepper and saute until the shrimp have just turned pink, about 5 minutes, stirring often. Set aside.
  3. Add the remaining oil and garlic to the skillet, cook 30 seconds then add the zucchini noodles, kosher salt and pepper. Cook 2 minutes, stirring.
  4. Remove from the heat, add the shrimp, parsley, lemon zest, lemon juice, and red pepper flakes. Toss well to combine and serve immediately.

Breakfast: Avocado and Egg Toast

IMG_1459Normally, throughout the week the wife makes us a smoothie for breakfast.  You can check out the recipe for that here.  However, sometimes you need a break from the smoothies and bust out something different.

The wife got the idea for these things a while ago from another blog she reads.  I wasn’t sure how avocado and a hard boiled egg would go together, but after the first bite I was sold.  It was delicious.  It is a breakfast that I could eat just about every day of the week.

The nice thing about the breakfast is that it’s super simple to put together as well.  Especially, since the wife figured out a really easy way to make the hardboiled eggs.  After looking online, we now just put the eggs into a muffin tin, and pop them into the oven.  She looks up the directions each time, but it looks like a majority of the web throws them into the oven at 325 for 30 minutes.  After they come out, put them in and ice bath…and done.  They’ve come out perfect every time.

Once the eggs are done it’s really just a matter of assembling everything.  To try and save on calories we skip the toast and use some Thomas Plain Bagel Thins.  Throw those things in the toaster for a few minutes and get them nice and crisp.  On top of the toast/bagel thin spread half of an avocado.  We just mash the avocado up with a fork in a bowl to allow it to spread easily, but still have some chunks left in it.

One of the kitchen tools that comes in handy here is the egg slicer.  It makes it easy to cut the egg up in even slices.  Take your cut up egg and place it all over the toast/bagel.  Once you have the egg and avocado on, it’s time to season.  Go ahead and put a liberal helping of salt and pepper on top.  The kicker here are the red pepper flakes.  It gives the toast/bagel a bit of a bite and heat that really works well.

I can’t tell you how happy this breakfast makes me.  It’s satisfying, healthy, and delicious.  With the ability to make a bunch of eggs at once, you can easily have this a couple of mornings in a row.  Remember…keep the pit of the avocado in any extra you may have to keep it from turning brown.  This way when you go back for seconds or the next day, your avocado isn’t brown.

Now excuse me while I make sure we have the stuff we need for this in the house…because I have a craving again.

My Biggest Fear

Here’s a post from the old days and my Tumblr that I thought I would bring over.  Still slightly fearful of these things today…

When I was little I lived in Elk Grove, California.  I lived there for about five or so years and moved away after the first grade.  I remember a lot of things about living there. Like my parents brining home singing nuns (you read that right), watching the field behind our neighborhood catch fire, me learning to ride a bike and slamming into a truck…I can go on and on.  However, there was one thing that was told to me during this time that stuck with me for years.  It started a fear that I couldn’t get over for years.

That fear?

Continue reading

Dinner: Chicken Charlemagne with Roasted Root Vegetables and Parsnip-Potato Mash

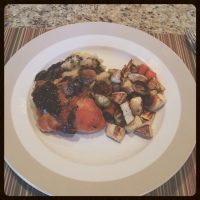
IMG_1382Our second Blue Apron meal is definitely the fanciest sounding of the bunch…Chicken Charlemagne.  It just sounds posh.  In any case, another meal to try out that we normally wouldn’t make on our own.

The meal came together pretty easily as Blue Apron meals normally do.  As usual, cut up some veggies and let those cook while you protein cooks.  In this case, we made a huge mess with all of the oil that splashed out of the pan we were cooking the chicken in.  Outside of that mess, everything came together right on time.

We’re always a big fan of roasted vegetables, so we were at the very least on board with the ones we were making here.  One of our last Blue Apron meals had turnips in it, so we were pretty excited to see them back (enough we made roasted turnips just tonight).  The other side that they threw in with the meal was a parsnip-potato mash.  I’ve never had parsnips before that I can think of so I didn’t know what to expect.  The mix was pretty tasty.  If this leads to a lower calorie way to eat mashed potatoes, count me in.  You can’t tell too much of a different, and you throw some gravy on it and no one will know.

This is also the second time we’ve had the airline chicken breasts.  They are just the right size and have the skin on top that crisp ups really nicely in the oil.  With this meal we had the sauce to add on top of everything and it was delicious.  As with most of my meals that are good, I ate it straight without saying a word.  If you want to know if I’m enjoying a meal…look to see how little I talk.

We’re five Blue Apron meals in total and they’ve all be great.  I definitely recommend the service.  One more to go…next up is Banana Leaf-Steamed Cod with Spiced Rice, Yu Choy, and Coconut.

Dinner Beer: Long Trail 25th Anniversary Ale

Chicken Charlemagne with Roasted Root Vegetables and Parsnip-Potato Mash

Ingredients

  • 2 Airline Chicken Breasts
  • 2 Ounces Brussels Sprouts
  • 2 Carrots
  •  Ounces Parsnips
  • 8 Ounces Purple Top Turnip
  • 1 Russet Potato
  • 1 Large Bunch Sage
  • 3 Tablespoons Chicken Demi-Glace
  • 2 Tablespoons Butter
  • 1 Tablespoon Apple Cider Vinegar
  • 1 Teaspoon Charlemagne Spice Blend (Ground Mustard, Black Mustard Seeds & Ground Bay Leaf)

Directions

  1. Preheat the oven to 450°F. Wash and dry the fresh produce. Heat a large pot of salted water to boiling on high. Remove the chicken from the refrigerator to bring to room temperature. Trim off and discard the root ends of the Brussels sprouts; halve the sprouts lengthwise. Peel and large dice the carrots, parsnips, turnip and potato. Pick the sage leaves off the stems; discard the stems.
  2. Place the Brussels sprouts, carrots and turnip on a sheet pan. Drizzle with olive oil and season with salt and pepper; toss thoroughly to coat. Arrange the seasoned vegetables in a single, even layer. Roast 26 to 28 minutes, or until the vegetables are tender and slightly browned.
  3. While the vegetables roast, add the parsnip and potato to the pot of boiling water. Cook 18 to 20 minutes, or until tender when pierced with a fork. Drain thoroughly and return to the pot. Add half the butter and season with salt and pepper. Using a fork, mash to your desired consistency. Set aside in a warm place.
  4. While the parsnips and potato cook, in a medium pan (nonstick if you have one), heat 2 tablespoons of olive oil on medium-high until hot. Add the sage leaves. Cook, flipping occasionally, 1 to 2 minutes, or until the leaves are crispy and fragrant. Using a slotted spoon or spatula, transfer the crispy sage leaves to a paper towel-lined plate and season immediately with salt and pepper. Carefully discard half the oil, leaving the remaining half in the pan.
  5. While the vegetables continue to roast, season the chicken with salt and pepper on both sides. Heat the pan of reserved sage-frying oil on medium until hot. Add the seasoned chicken, skin side down first. Cook, loosely covering the pan with aluminum foil, 6 to 8 minutes per side, or until the skin is browned and the chicken is cooked through (the juices should run clear). Transfer to a plate, leaving any browned bits (or fond) in the pan. Loosely cover the cooked chicken with aluminum foil and set aside in a warm place.
  6. Heat the pan of reserved fond on medium until hot. Add the chicken demi-glace, apple cider vinegar, spice blend and ¼ cup of water. Cook, stirring frequently, 1 to 2 minutes, or until slightly reduced in volume. Add the remaining butter and cook, stirring occasionally, 1 to 2 minutes, or until melted. Season with salt and pepper to taste and remove from heat. To plate your dish, divide the parsnip-potato mash and roasted vegetables between 2 plates. Top each with a piece ofchicken and some of the pan sauce. Garnish with the crispy sage leaves. Enjoy!

Dinner: Korean-Style Tteok with Spicy Pork “Ragù” & Gai Lan

IMG_1340Over Christmas we found a pretty good deal for another week of Blue Apron meals.  Since the first round was delicious, we decided to try it out again.  For $30, we got three new meals to try out.  $10 a meal for the two of us was just too good to pass up.  The big box showed up last week and it was time to dig in.

The first recipe up that we wanted to try out was the Korean Style Tteok.  We recently were introduced to Korean food and this one looked and sounded pretty good.  There were definitely some ingredients we had never heard of before and who knew how they tasted, but what the hell…we’re up for trying anything once.

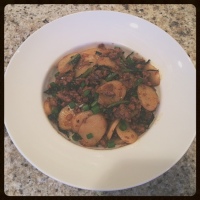
The best part about the Blue Apron meals is having everything measured out and ready to go.  We had to chop up a few things, but that took all of three minutes.  Everything else is packaged up and ready to go.  With this recipe, it was pretty much throw everything into a pan at different intervals and cook it up.  We tasted the sauce to get the right ratio of sweet soy sauce to gochujang (a spicy sauce).  We used all of the sweet soy sauce and about three quarters of the gochujang sauce.

While the pot with the spicy pork was marinating together, we threw the Korean rice cakes on.  We had never seen these before.  They kind of reminded me of water chestnuts in the bag, but then you boil them in water for a few minutes.  Still not knowing how they taste or the texture, we threw them into the mix with everything else.

The recipe didn’t call for it, but we added a little rice to the bottom of our bowls of tteok.  We threw the mixture on top, added the scallions an sat down to dive in.  I loved it.  The rice cakes had a doughy constancy to them.  The meal as a whole reminded me of a deconstructed pot sticker.  Like if you took the rice cakes and rolled the pork up in them, it would make a pot sticker.  I love pot stickers, so this was right up my alley.  The wife doesn’t care for doughy things too much, so while she liked the meal…she was not a fan of the rice cakes.  Overall, definitely a fan of this one.

We are now four for four on Blue Apron meals.  We have two more to try and I can’t wait to get into them!

Dinner Beer: Fiddlehead Mastermind

Korean-Style Tteok with Spicy Pork “Ragù” & Gai Lan

Ingredients

  • 10 Ounces Ground Pork
  • 8 Ounces Korean Rice Cakes
  • 1 Bunch Gai Lan
  • 3 Cloves Garlic
  • 2 Scallions
  • 1 Yellow Onion
  • 1 1-Inch Piece Ginger
  • 2 Tablespoons Sweet Soy Sauce
  • 2 Tablespoons Heavy Cream
  • 1 Tablespoon Garlic Black Bean Sauce
  • 1 Tablespoon Gochujang

Directions

  1. Wash and dry the fresh produce. Heat a medium pot of salted water to boiling on high. Remove the very end of the gai lan stems; roughly chop the gai lan leaves and stems. Peel and mince the garlic and ginger. Remove and discard the root end of the scallions; thinly slice the scallions, separating the white bottoms and green tops. Peel and small dice the onion.
  2. In a large pan (nonstick if you have one), heat 2 teaspoons of oil on medium until hot. Add the pork and season with salt and pepper. Cook, frequently breaking the meat apart with a spoon, 4 to 6 minutes, or until browned and cooked through. Transfer to a bowl and set aside, leaving any drippings in the pan.
  3. Heat the pan of reserved pork drippings on medium until hot. Add the garlic, ginger, onion and white bottoms of the scallions. Cook, stirring occasionally, 2 to 3 minutes, or until fragrant and the onion has softened.
  4. To the pan of aromatics, add the gai lan, sweet soy sauce, garlic black bean sauce, heavy cream, cooked pork, ½ cup of water and as much of the gochujang as you’d like, depending on how spicy you’d like the dish to be. Cook, stirring occasionally, 7 to 9 minutes, or until the sauce has thickened.
  5. After the sauce has cooked for 5 minutes, add the Korean rice cakes to the pot of boiling water. Cook 2 to 3 minutes. Drain and immediately transfer to the pan of ragù; season with salt and pepper. Cook, stirring occasionally, 2 to 3 minutes, or until the Korean rice cakes are thoroughly coated in the sauce. Remove from heat and season with salt and pepper to taste.
  6. Divide the Korean rice cakes and “ragù” between 2 dishes. Garnish with the green tops of the scallions.

Dinner & Dessert: Steaks and Pioneer Woman Apple Dumplings

IMG_1285We’ve recently remodeled our kitchen (more on that in another post), so of course we had to break it in with a fancy dinner.  Of course the meal we wanted was steaks.  Nothing is better than a nice steak…nothing.  Once we settled on steaks we threw on some simple sides to it and the set off looking for a dessert to make.  We’ll get to that in a minute.

So, dinner.  We grabbed some filets from the grocery to grill up.  We used the rest of our steak rub we picked up from Findlay Market to get a nice taste to the steaks.  Along side of those we made some baked potatoes.  The way we made them comes from my mother-in-law and it’s great.  Poke some holes in them, cover with olive oil and salt, and bake at 450 for about 30-40 minutes (or until done depending on the size).  These things are so good.  I literally eat every bit including the salty crunch skin…damn they’re good.  Since you should have veggies we steamed some broccoli, but because we were making a bad ass first dinner we put some cheese sauce on top.  Add a garlic knot and some beer and SHAZAM!  I finished my plate and part of my wife’s and I was stuffed.

However, as a true American…I had to eat dessert.  I mean, I cleaned my plate and that’s what my second stomach is for.  The wife had found a Pioneer Woman recipe earlier in the day that we wanted to try out.  With most Pioneer Woman recipes…it’s not going to be bad.  This was definitely the case here with these things.

The assembly of the apple dumplings looked pretty simple as I watched the wife work her magic.  Once assembled you pour butter and Mountain Dew over the top of them.  I’m pretty sure this recipe is a Honey Boo Boo fever dream come to life.  It will simultaneously rot your teeth while clogging your arteries…in the most delicious way possible.

Once this came out of the oven, we plated the things up and scooped some vanilla ice cream on top.  Not to let anything go to waste, we poured some of the extra sauce on top.  HOLY BATMAN PEOPLE! They were legit good.  Super easy to make and super enjoyable.

It was a great meal overall in the new kitchen.  If you ever need to celebrate something in the future, I recommend steaks and something from the Pioneer Woman for dessert.  I know I’ll be using that plan!

Pioneer Woman Apple Dumplings

Ingredients

  • 2 whole Granny Smith Apples
  • 2 cans (8 Oz. Cans) Crescent Rolls
  • 2 sticks Butter
  • 1-1/2 cup Sugar
  • 1 teaspoon Vanilla
  • Cinnamon, To Taste
  • 1 can (12 Oz.) Mountain Dew Soda

Directions

  1. Peel and core apples. Cut each apple into 8 slices each. Roll each apple slice in a crescent roll. Place in a 9 x 13 buttered pan.
  2. Melt butter, then add sugar and barely stir. Add vanilla, stir, and pour entire mixture over apples. Pour Mountain Dew around the edges of the pan.
  3. Sprinkle with cinnamon and bake at 350 degrees for 40 minutes. Serve with ice cream, and spoon some of the sweet sauces from the pan over the top.

Dinner: Cheesy Turkey Taco Chili Mac

IMG_1265I think this blog is basically turning into a review site for Skinnytaste recipes.  I’m okay with that.  We’ve yet to have a bad meal from her site and they are usually fairly easy to throw together. This one we had a few weeks back, but as per usual I’m lazy and haven’t gotten around to posting about it until now.

This one was another that I saw on her Instagram feed and texted the wife that we had to try it.  Being the awesomest wife, it was on the table the next night!  I figured with the original picture I saw and the fact the recipe started with the word, “cheesy”, it couldn’t be half bad.

One nice thing about this recipe is that it comes together in one pot pretty easily and quickly.  It’s really a matter of adding everything in, cook it up, stir a few times, and serve.  With most things, this was about halfway done before I stepped in the door.  I may have thrown in an ingredient or two to say that I helped.

Once things were ready, it was plating time.  We put in a single serving into a bowl, but I made sure to have that single serving twice during the meal.  We mixed up a Dole Chopped Salad Kit on the side just to round off the meal.

The turkey taco chili mac was everything that you would expect.  It was thick like chili, definitely cheesy, and just a slight vibe of mac due to the noodles.  I loved it.  I’m definitely a fan of thicker type soups like chilis, so this was right up my alley.  It wasn’t too spicy which allows you to throw in some hot sauce of some sort if you want.  All in all, a great meal that I’m looking forward to “making” (re: eating) again.  And in case you were wondering, it heats up great.  I know I ate it until it was gone the next couple days over lunch.

Speaking of making this again…wifey…if you’re reading this…

Dinner Beer: Long Trail Farmhouse Black Rye IPA

One Pot Cheesy Turkey Taco Chili Mac

Ingredients:

For the homemade taco seasoning:

  • 1 1/2 tsp garlic powder
  • 1 1/2 tsp cumin
  • 1 tsp kosher salt
  • 1 1/2 tsp chili powder
  • 1 1/2 tsp paprika
  • 1/2 tsp oregano

For the Chili:

  • 1.3 lb 93% lean ground turkey
  • 1 medium onion, chopped
  • 3 cloves minced garlic
  • 1 red bell pepper, chopped
  • 10 oz can rotel tomatoes with green chilies
  • 14.5 oz can pink or red beans, drained
  • 8 oz tomato sauce
  • 1/2 can (8 oz) fat-free refried beans
  • 1 (15 oz can) reduced sodium chicken broth*
  • 1 3/4 cups water
  • 8 oz DeLallo Gluten Free shells (or DeLallo whole wheat)
  • 3/4 cup part-skim shredded sharp cheddar cheese*
  • 2 tbsp fresh cilantro, chopped
  • 2 tbsp chopped scallions

Directions

  1. Heat a large Dutch oven or pot with a fitted lid over medium-high heat and spray with oil, brown the turkey breaking it up with a wooden spoon as it cooks. When cooked through, add the onions, garlic, pepper and taco seasoning; cook 2-3 minutes.
  2. Add the canned tomatoes, beans, tomato sauce, refried beans, chicken broth and water. Bring to a boil, cover and simmer about 15 minutes. Adjust salt to taste.
  3. Stir in the uncooked pasta and simmer uncovered over medium heat until al dente, about 6 minutes or according to package directions.
  4. Remove the pot from heat and top with the cheese, cover and let sit for about 2-3 minutes, until the cheese melts.
  5. Serve immediately garnished with fresh cilantro and scallions.

Dinner: Seattle Asian Salmon Bowls

Finished product.

In the last post I talked about how we make Skinnytaste recipes a lot.  Well, here’s another one.  The wife and I both saw this recipe while looking through Instagram.  We both follow Skinnytaste on there and you should too (do so here).  We’ve now made two delicious recipes based on pictures alone.

This time around it was these Asian Salmon Bowls that caught our eye.  We’re usually game for anything involving salmon.  Throw in some Asian ingredients and we’re pretty much sold.  Especially when the ingredients are pretty much sushi…just not rolled up.

As per most recipes, I came home to this being 95% done.  I acted like I helped a bit (opened a beer) and everything was ready to go.  The wife had everything looking marvelous as usual.  I mean, just look at it.  On the side we made up some edamame (freezer bag).  A quick throw into a microwave and a ton of salt later…BOOM!

We dug in and once again, loved what we were eating.  I think we would cut down the wasabi a little for next time or possibly add a little less of the sauce to the bowl.  Other than that the dish was delicious.  It is pretty much a salmon roll that the sushi chef was too lazy to roll up.  It’s great to now have a recipe we can make at home if we have an Asian or even a sushi fix.  This one will fit the bill and keep things healthy.

Below is the recipe (which you can find on the Skinnytaste site here)…and like I said in the last post, buy her cookbook here!

Seattle Asian Salmon Bowls

Ingredients:

For The Salmon Bowl:

  • 1/2 cup green onions, thinly sliced
  • 1 English cucumber, sliced
  • 1 tbsp toasted sesame seeds
  • 1 4-ounce avocado, diced
  • 2 cups cooked brown rice
  • 3/4 cup sprouts such as daikon radish
  • 1 strip nori, shredded
  • 16 ounces wild salmon, cut in 4 pieces
  • olive oil spray
  • salt and fresh ground pepper to taste

For the Soy-Wasabi Vinaigrette:

  • 2 tbsp less sodium soy sauce (or GF Tamari)
  • 2 tsp wasabi in tube
  • 2 tbsp mirin
  • 2 tbsp rice wine vinegar
  • 1 tbsp sesame oil

Directions

  1. Combine the vinaigrette ingredients in a bowl and set aside.  Heat rice and keep warm.
  2. Season salmon with a pinch of salt and fresh pepper. Heat a frying pan or sauté pan over medium-high heat. Spray the pan lightly with oil spray. When hot sear salmon, around 2 – 4 minutes per side (depending on the thickness of the fish).
  3. Split rice into four bowls equally, 1/2 cup each. Top each bowl with 1 oz avocado, green onions, cucumbers, sesame seeds, and sprouts. Place salmon on top of each bowl, drizzle with the vinaigrette, and sprinkle with shredded nori.

Dinner: Chicken Marsala

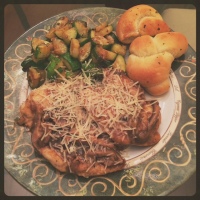
IMG_1165It’s been a while since I’ve posted anything, so I figured I would start up again with a quick post.  I’m not going to go in length on this one except to say make it and buy the Skinnytaste cookbook.

The original recipe from this is from the new Skinnytaste cookbook.  We make stuff from her site all the time and she happened to come out with a cookbook of new recipes.  The wife found this one online and we did two things: make this and order the cookbook.

The wife threw this together the other night and we both couldn’t stop talking about how good it was.  It was good enough to make it a second time in a week.  Flash forward to this week and we’re most likely going to be making it again. It’s just that easy and good.  Each time we made it with some roasted veggies and some garlic knots.  In both cases I also went back for seconds (but that shouldn’t surprise anyone).

So, you can click here to go to the site that we grabbed the recipe from.  In addition, click here to go buy the cookbook!

Dinner: Moussaka-Style Lasagna (Blue Apron Meal 1)

IMG_0322A little bit ago, the wife won a few free meals from Blue Apron from a blog that she reads (Sweet Tooth Sweet Life).  After filling out the information necessary to claim the meals, it was sit and wait.  Some days went by and then all of a sudden there was a huge box on our doorstep.  In it was everything we would need to make three different meals.  These posts will be a bit different as the recipes are a bit long.  I’ll link to Blue Apron’s site and you can get the details from there.  Overall, the experience with Blue Apron was a pretty great one and we would totally think about doing them again.

The first meal we made was a greek style, or moussaka style lasagna, as they called it.  I had some reservations about this one as it had oranges in it.  Who puts oranges in lasagna?  Anyway, we got to work unpacking the ingredients for the meal and putting it together.  We dirtied a lot of dishes here, but in all it came together pretty easily.  The eggplant was sliced up and roasted in the oven.  While that was going we cooked the meat in our braiser.  In the braiser went a number of other ingredients.  The oddest of these were the orange slices.  Once we stirred in the spinach, I decided I had to take a taste.  I was actually surprised that it was good.  Throw some noodles an béchamel sauce on top and I’m it would turn out.

The béchamel sauce is just flour, milk, and butter that is essentially reduced for a bit.  This thickens things up and works as a layer in the lasagna where cheese may have been.  So, once everything was ready it was time to build the lasagna.  We went with a layer of meat mixture, then eggplant, then noodles, and finally the béchamel sauce.  We repeated this twice and then topped it with the feta cheese that was provided.

After a few minutes in the oven (and a couple to cool) it was time to eat.  The recipe made enough for about four servings.  We had some leftover cheesy garlic bread that we put in the oven to have on the side.  I hesitantly put my fork through the lasagna and moved it to my mouth.  When everything came together, it made a really good lasagna.  The citrus came through, but was not overpowering.  You could definitely get the Greek vibe that the lasagna is going for.  The wife and I were pretty impressed with the final results.  If you like Greek and lasagna then you should try this.  However, if you’re not really an adventurous eater…I would probably say just stick to the classic Italian lasagna.

Next up for our Blue Apron meal experiment…crispy fish sandwiches with coleslaw!

Moussaka-Style Lasagna with Eggplant and Spinach